

A first look at Ghidra’s Debugger - Game Boy Advance Edition
Overview
Yesterday the NSA Twitter account announced that a new branch of Ghidra has been release with the long-awaited debugging capability. This will allow for single-step debugging of a program within Ghidra through a GDB stub or other various debug mechanisms. To celebrate this (and my being stuck at home quarantining…) I wanted to review how to build this version of Ghidra and give an example of how to use this debugger on a fun target.
This post will explain the following:
- How to build the latest (or any) version of Ghidra using a Docker Container
- How to build the Ghidra Eclipse plugins
- How to build a program loader for Ghidra
- Debugging a program with Ghidra using the GDB stub
- Use the debugging capability to help us learn about how passwords are processed for a GBA game
For this post, we’re going to be taking a look at the Game Boy Advance game Spiderman: Mysterio’s Menace. I’ve been very much inspired by all of the awesome work that stacksmashing and Liveoverflow have been doing regarding these topics. This was a game that I spent a lot of time playing and it’s always fun revisiting childhood favorites from an RE perspective. The ultimate goal is to demonstrate how to properly load this ROM using a custom loader, and connect to an emulator’s GDB stub using Ghidra’s debugging features.
RE Note/Tangent: When taking on a new reversing project, it’s important to try to compartmentalize goals and targets. For example, if we said we just want to reverse this game, that opens up endless possibilities. We could reverse engineer the collision detection, how enemy AI works, or how level maps are generated. For this post, we will pick a specific target and take a look at the password mechanism in use by this game.
I am doing all of this work on an Ubuntu 20.04 machine, with the latest updates.
Blog Updates (as of 2022):
- Future blog posts and entries can be found here.
- If you are interested in learning more about reverse engineering check out my 5 day hardware hacking course, public and private offerings are available upon request
- Never want to miss an update or blog post? Check out my mailing list for a quarterly newsletter about reverse engineering embedded devices
Building Ghidra
First things first, this debugger branch has not yet been included in an official release so we’re going to have to build it ourselves. Luckily for us dukebarman has put together a docker container for us to do this, all we need to do is modify the build_ghidra.sh script to checkout the debugger branch, see the following line below:
1
git clone https://github.com/NationalSecurityAgency/ghidra -b debugger
We are also going to build the Eclipse development extensions for this version of Ghidra, this will help us later on when we build a loader and write our analysis scripts. To do this we add the following line to the build_ghidra.sh script:
1
2
gradle prepDev
gradle eclipse -PeclipsePDE
Next follow the instructions in the README:
1
2
3
4
cd ghidra-builder
sudo docker-tpl/build
cd workdir
sudo ../docker-tpl/run ./build_ghidra.sh
This will take some time, so maybe go grab a coffee or two and come back to your freshly built Ghidra. The resulting build can be found in workdir/out:
1
2
wrongbaud@wubuntu:~/blog/gba-re-gbd/ghidra-builder/workdir$ ls out/
ghidra_9.3_DEV_20201218_linux64.zip
Unzip this file, and you can launch Ghidra via the ./ghidraRun script. For this post, I will unzip this into the ghidra-builder/workdir directory because we’re going to be using the docker container to build a Ghidra loader for this version of Ghidra. If you’re following along, your workdir directory should look like this:
1
2
wrongbaud@wubuntu:~/blog/gba-re-gbd/ghidra-builder/workdir$ ls
build_ghidra.sh  ghidra  ghidra_9.3_DEV out  set_exec_flag.sh
Building Eclipse Plugins
Now that we have a new version of Ghidra built, we also need to build the GhidraDev plugin for Eclipse. The eclipse projects can be found in the ghidra-builder/workdir/ghidra/GhidraBuild/EclipsePlugins/GhidraDev directory.
- Install Eclipse
- Select the Java IDE
- Install CDT, PyDev, and Plugin Development Environment
- This can be done from the Eclipse marketplace
- Import the GhidraDevFeature and GhidraDevPlugin projects
- These can be found in the
ghidra-builder/workdir/ghidra/GhidraBuild/EclipsePlugins/GhidraDev/directory File->Import->General->Existing Projects into Workspace- Add
ghidra-builder/workdir/ghidra/GhidraBuild/EclipsePlugins/GhidraDev - Select “Search for nested projects”
- Import the projects!
- Note: you may see some build errors when these are imported, you can ignore these as you are just exporting the plugin!
- These can be found in the
- With these projects loaded, we can now export the plugin
File->ExportPlug-in Development->Deployable Featuresghidradev.ghidradev- Select an archive location for the plugin to be exported to
- Click Finish!
Now we have our Ghidra plugin, built for our custom version of Ghidra that we can load via Help->Install New Software.
And with that, we have built Ghidra from the debugger branch, and have also built the Eclipse development extensions so we can build plugins for our new version of Ghidra!
Note: I just want to take a second to outline just how incredible the help docs are for Ghidra. From the P-Code manuals to the instructions on building and exporting these plugins - the project is very well documented.
Building the ROM Loader
To properly analyze this ROM in Ghidra, we are going to need to define all of the memory regions and peripherals for the Game Boy Advance. Luckily for us, SiD3W4y on GitHub has already written one.
If you are a regular reader of this blog, a ghidra loader may be a familiar subject to you. If not, the purpose of a Ghidra loader is to set up all of the necessary memory regions, identify any debug information or symbols that may be present in the file, and provide as much information as possible about the target file. The loader that was mentioned before outlines all of the basic peripherals of the GBA and is an excellent example loader to work with, let’s start by cloning it into the ghidra-builder/workdir directory. We’re doing this because we’re going to use the same docker container we built Ghidra with to build this loader.
1
2
3
4
5
6
7
8
9
cd ghidra-builder/workdir
git clone https://github.com/SiD3W4y/GhidraGBA
sudo ../docker-tpl/run /bin/bash
dockerbot@797eb43ce05f:/$ cd /files/GhidraGBA
dockerbot@797eb43ce05f:/files/GhidraGBA$ export GHIDRA_INSTALL_DIR=/files/ghidra_9.3_DEV/
dockerbot@797eb43ce05f:/files/GhidraGBA$ gradle
dockerbot@797eb43ce05f:/files/GhidraGBA$ cp dist/ghidra_9.3_DEV_20201218_GhidraGBA.zip ../ghidra_9.3_DEV/Extensions/Ghidra/
dockerbot@797eb43ce05f:/files/GhidraGBA$ exit
exit
In case the above steps are confusing, what we are doing is:
- Launching the docker container
- Building the GhidraGBA extension, providing the path to our installation
- Copying it to Ghidra’s extensions directory (so it will show up under the Install Extensions menu)
- Exiting the docker container
Launch Ghidra via ghidraRun and go to File-> Install Extensions. Select the GhidraGBA loader and click OK. You will need to restart Ghidra for the change to take effect. Now when you load a GBA ROM you should see the following:

After running the auto analysis, Ghidra seems to make a pretty quick sense of the ROM. There are a lot of functions defined and things are looking good. So the next step is to figure out some way to narrow down what we care about in this ROM image, in other words, we need to find our needle in the haystack. Let’s start by examining how the password system works in this game by entering a few passwords.
Analyzing the Rom
As mentioned before, our goal here is to try to understand the password system in use by this game. If we attempt to enter a password, the following screen is displayed:

Note that we have all of the consonants and no vowels and numbers “0-9”, and our passwords are only 5 characters long. This is a nice starting point for us as reverse engineers. We can use this information to help us narrow down functions of interest. For example- let’s look through the strings in the ROM and see if these values are represented in a string somewhere. If we open the strings window, Window -> Defined Strings, and filter for the first 5 characters available to us as password characters we see the following:
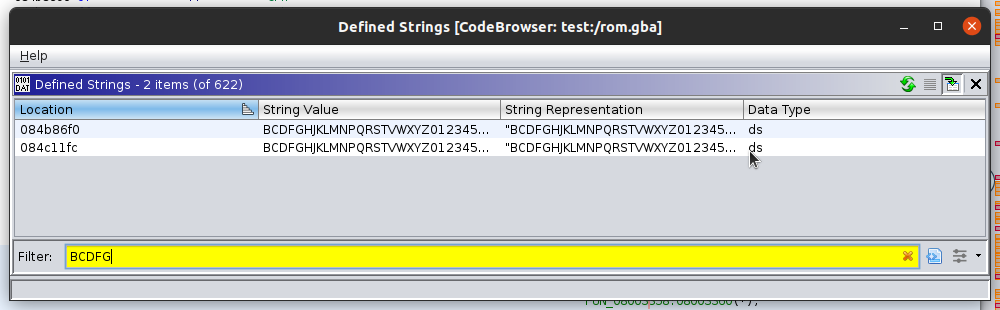
So far so good - we only have two instances of this string in use. One is located at 0x804c11fc and one at 0x84b86f0. Upon examination of the first one, we see that this string gets passed to a function in the subroutine located at 0x8003358, see below:
1
2
3
4
5
6
7
8
9
10
11
12
13
14
15
16
17
18
19
20
21
22
23
24
25
26
27
undefined4 passwd_1(int param_1,int param_2)

{
  int iVar1;
  uint uVar2;
  uint uVar3;
  undefined4 in_lr;
  undefined auStack52 [36];
  undefined4 uStack4;

  uStack4 = in_lr;
  FUN_080231f4(auStack52,"BCDFGHJKLMNPQRSTVWXYZ0123456789-",0x21);
  *(uint *)(param_1 + 0x8c) = 0;
  FUN_080025f8(param_1);
  FUN_08002674(param_1);
  FUN_08002714(param_1);
  FUN_0800282c(param_1);
  iVar1 = 0;
  uVar3 = *(uint *)(param_1 + 0x8c);
  uVar2 = 0;
  do {
    *(undefined *)(param_2 + iVar1) = auStack52[uVar3 >> (uVar2 & 0xff) & 0x1f];
    uVar2 = uVar2 + 5;
    iVar1 = iVar1 + 1;
  } while (iVar1 < 5);
  return uStack4;
}
Notice also the while loop that is looping while a variable is less than five, this is a good indicator that this function might be useful as we know that the password length is 5! Let’s label it passwd_1 and move onto the other uses of our character string. The next one that we can see is in the function at 0x8002CEC, the decompilation can be seen below:
1
2
3
4
5
6
7
8
9
10
11
12
13
14
15
16
17
18
19
20
21
22
23
24
25
26
27
28
29
30
31
32
33
34
35
36
37
38
39
40
41
42
43
44
45
46
47
undefined8 passwd_2(void)

{
  int iVar1;
  int iVar2;
  uint uVar3;
  undefined4 in_lr;
  undefined local_98 [5];
  undefined local_93;
  undefined auStack144 [36];
  undefined auStack108 [8];
  undefined auStack100 [72];
  undefined4 uStack4;

  uStack4 = in_lr;
  FUN_08000b0c(0,1,0,0);
  DAT_03001fd0._0_2_ = 0x1444;
  DISPCNT = 0x1444;
  FUN_0801e330(&DAT_0838277c);
  iVar1 = DAT_03001fe0;
  FUN_080231f4(auStack144,"BCDFGHJKLMNPQRSTVWXYZ0123456789-",0x21);
  *(uint *)(iVar1 + 0x8c) = 0;
  FUN_080025f8(iVar1);
  FUN_08002674(iVar1);
  FUN_08002714(iVar1);
  FUN_0800282c(iVar1);
  iVar2 = 0;
  uVar3 = 0;
  do {
    local_98[iVar2] = auStack144[*(uint *)(iVar1 + 0x8c) >> (uVar3 & 0xff) & 0x1f];
    uVar3 = uVar3 + 5;
    iVar2 = iVar2 + 1;
  } while (iVar2 < 5);
  local_93 = 0;
  FUN_0801d1bc(auStack108,local_98);
  FUN_0801d92c(DAT_03001ff0,0x10,0);
  FUN_08000b0c(1,1,0,0);
  *(undefined4 *)(DAT_03002028 + 0xc) = 0x200;
  FUN_08000f1c();
  iVar1 = FUN_0801d26c(auStack108);
  *(undefined4 *)(DAT_03002028 + 0xc) = 0;
  FUN_08000f1c();
  FUN_0801dcac(DAT_03001ff0,0);
  FUN_08000b0c(0,1,0,0);
  FUN_08004408(auStack100,2);
  return CONCAT44(uStack4,(uint)(iVar1 == 0));
}
Once again we see the character string being passed into a function, and we also see another while loop that runs for 5 iterations - let’s label this one as passwd_2 and move on to the next usage. The string located at 0x84b86f0 is also used in two subroutines, investigating the first one located at FUN_0801c37c:
1
2
3
4
5
6
7
8
9
10
11
12
13
14
15
16
17
18
19
20
21
22
23
24
25
26
27
28
29
30
31
32
33
34
35
36
37
38
39
40
41
42
undefined4 render_pw_screen(int param_1)

{
  int iVar1;
  int iVar2;
  uint uVar3;
  undefined4 uVar4;
  uint uVar5;
  undefined4 in_lr;
  char local_1c [8];
  undefined4 uStack4;

  uStack4 = in_lr;
  iVar2 = FUN_0801b834(DAT_03001ffc,"@ - Accept   & - Backspace");
  iVar1 = DAT_03001ffc;
  *(uint *)(DAT_03001ffc + 0x90) = 0xf0U - iVar2 >> 1;
  *(undefined4 *)(iVar1 + 0x94) = 0x96;
  FUN_0801b764(iVar1,"@ - Accept   & - Backspace");
  uVar3 = *(uint *)(param_1 + 0x51c);
  if (uVar3 != 0) {
    uVar5 = 0;
    if (uVar3 != 0) {
      do {
        local_1c[uVar5] = "BCDFGHJKLMNPQRSTVWXYZ0123456789-"[*(byte *)(param_1 + 0x520 + uVar5)];
        uVar5 = uVar5 + 1;
      } while (uVar5 < uVar3);
    }
    local_1c[*(int *)(param_1 + 0x51c)] = '\0';
    iVar2 = FUN_0801b834(DAT_03002000,local_1c);
    iVar1 = DAT_03002000;
    *(uint *)(DAT_03002000 + 0x90) = 0xf0U - iVar2 >> 1;
    *(undefined4 *)(iVar1 + 0x94) = 0x3f;
    iVar2 = FUN_0800118c(DAT_03001fdc,5);
    *(byte *)(iVar1 + 5) = *(byte *)(iVar1 + 5) & 0xf | (byte)(iVar2 << 4);
    FUN_0801b764(DAT_03002000,local_1c);
  }
  if (*(int *)(param_1 + 0x51c) != 5) {
    uVar4 = FUN_0801a6d4(*(undefined4 *)(param_1 + 0x18));
    *(undefined4 *)(param_1 + 4) = uVar4;
  }
  return uStack4;
}
If we take a look at this function, we can see that a FUN_0801b764 is being called with the @ - Accept & - Backspace string. Later on, we see that the same function is called with the variable containing our string of interest. If we investigate FUN_0801b764 further, it copies the data from the second variable (the ASCII string) to the memory address of the first argument. At this point, we can’t say for sure - but this makes me think that this particular subroutine is likely for rendering the text on the screen so I am going to ignore it for now and move onto the next usage of our password character string which can be seen below:
1
2
3
4
5
6
7
8
9
10
11
12
13
14
15
16
17
18
19
20
21
undefined8 FUN_0801c454(int param_1)

{
  int iVar1;
  int iVar2;
  undefined4 in_lr;
  char local_14 [8];
  undefined4 uStack4;

  iVar2 = 1;
  uStack4 = in_lr;
  FUN_080231f4(local_14,"CRDT5",6);
  iVar1 = 0;
  do {
    if (local_14[iVar1] != "BCDFGHJKLMNPQRSTVWXYZ0123456789-"[*(byte *)(param_1 + 0x520 + iVar1)]) {
      iVar2 = 0;
    }
    iVar1 = iVar1 + 1;
  } while ((iVar1 < 5) && (iVar2 != 0));
  return CONCAT44(uStack4,iVar2);
}
So what is happening here? First we have FUN_080231f4 which is essentially a memcpy operation:
1
2
3
4
5
6
7
8
9
10
11
12
13
14
15
16
17
18
19
20
21
22
23
24
25
26
27
28
29
30
31
32
33
34
35
undefined4 * memcpy_1(undefined4 *dest,undefined4 *src,uint count)

{
  undefined4 uVar1;
  undefined4 *puVar2;
  undefined4 *puVar3;

  puVar2 = dest;
  if ((0xf < count) && ((((uint)src | (uint)dest) & 3) == 0)) {
    do {
      *puVar2 = *src;
      puVar2[1] = src[1];
      puVar3 = src + 3;
      puVar2[2] = src[2];
      src = src + 4;
      puVar2[3] = *puVar3;
      puVar2 = puVar2 + 4;
      count = count - 0x10;
    } while (0xf < count);
    while (3 < count) {
      uVar1 = *src;
      src = src + 1;
      *puVar2 = uVar1;
      puVar2 = puVar2 + 1;
      count = count - 4;
    }
  }
  while (count = count - 1, count != 0xffffffff) {
    *(undefined *)puVar2 = *(undefined *)src;
    src = (undefined4 *)((int)src + 1);
    puVar2 = (undefined4 *)((int)puVar2 + 1);
  }
  return dest;
}
So what this is doing is copying the string CRDT5 to the memory location pointer to by local_14. Next we can see in the while loop, that this value is used in a comparison:
1
if (local_14[iVar1] != "BCDFGHJKLMNPQRSTVWXYZ0123456789-"[*(byte *)(param_1 + 0x520 + iVar1)])
So what is happening here? On each iteration, a character from local_14 is compared with a value from our available characters in the BCDFGHJKLMNPQRSTVWXYZ0123456789- string. This behavior seems to match up with what we might expect a password checking function to do…but we know that iVar1 is incremented by 1 with every iteration, does this mean that the passwords have to be made up of contiguous characters in the BCDFGHJKLMNPQRSTVWXYZ0123456789-? That would seem very silly, there is also no way that this would allow for the string CRDT5 to pass this check! If you look again at this comparison, you notice that there is a variable param_1 that is also being used as the index, which iVar1 and 0x520 are added to - these values are then used as an INDEX into our available characters.
So what does this mean for us exactly? The param_1 likely points to an array of offsets that represent which characters were typed in the password screen, for example, if we type the password GHDRR the array might contain [0x4,0x5,0x2,0xd,0xd].
But let’s not get ahead of ourselves, let’s try to type in the password CRDT5 and see what happens:

Aha! We’ve got a credits scene!
Seems simple enough right? But what if we could find out a little more about where our password is being stored in memory? If we knew where param_1 pointed to, we can calculate where our password is located in RAM and look for cross-references. Now that we have a function of interest, let’s break out the debugger!
Debugging the ROM
If you’re following along at home, you might have noticed a new tool showed up in our Ghidra project manager, see the image below:


Notice the Bug icon - this is used to open the debugger! When you clock on the bug, the following window will appear:

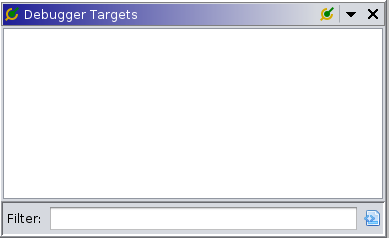
You’ll notice that there are a lot of additional tabs and windows compared to the normal analyzer view. For starters in the top left, we’ve got the debugger targets view, this is what we will use to establish a connection to our debugger or launch a new debugging session
Right below that there is an “Objects” window, this shows the active debugging “Objects” that are being debugged. From here you can pause, single step, etc.

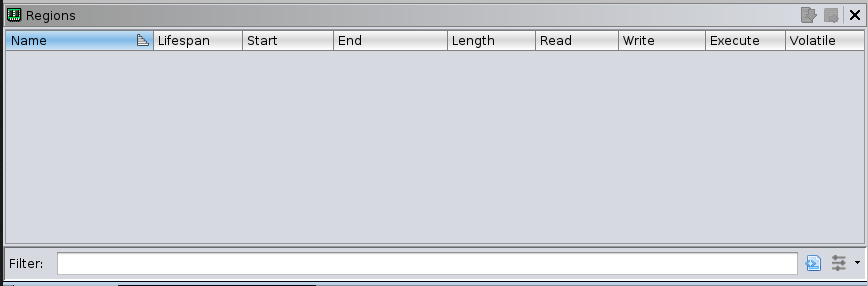
Under that, towards the bottom of the screen, we have the memory regions view, stack view, and standard console view.
Next to that, we have a view for threads (if applicable to your application) and a Time window - for what we are doing (debugging a single-threaded ARM system) we won’t be using these views

Finally, on the right we have a few more tabs than we would normally see in a Ghidra analyzer session, we have Breakpoints, which displays breakpoints that you have set:

We also have a Registers view that will update with register values when breakpoints are hit:

And finally, we have a modules view - where various loaded modules will show up if necessary - again for this simple application we won’t be seeing anything here:

Attaching to the Emulator
For this work, I’m using the mGBA emulator, mainly because it has the ability to present a remote GDB stub. We will be connecting to this with gdb-multiarch. To do this from the Debugger view in Ghidra we will do the following, int he debugger targets window - click the green plug (Connect) which will open the following window:

There are multiple options here for remote debugging. For this post we will be using the IN-VM GNU gdb local debugger
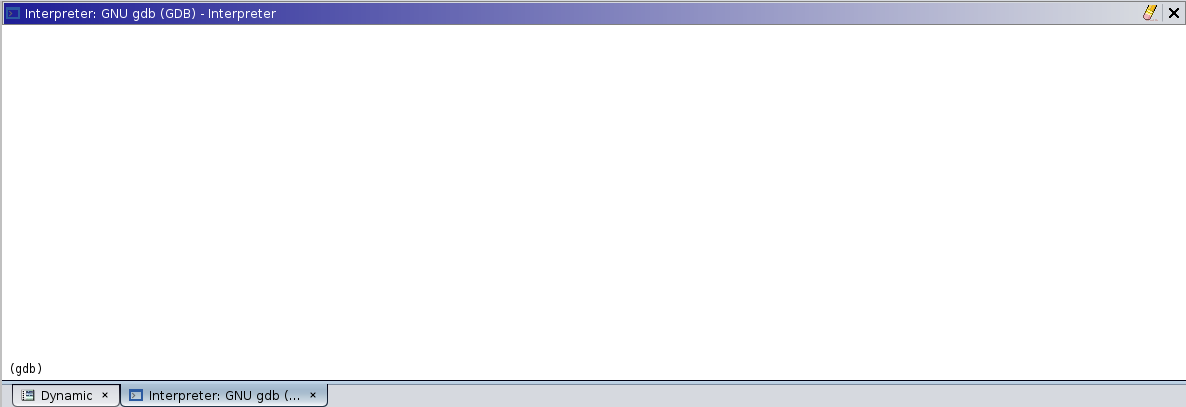
I have added gdb-multiarch to the gdb launch command path. After clicking connect a standard GDB prompt will appear:
Now we have to start the server, from within mGBA, load your ROM and select Tools -> Start GDB Server, the following prompt will appear:

Click start and return to the Ghidra debugger window. Within the gdb prompt - run the following commands:
1
2
3
4
5
6
set architecture arm
set arm fallback-mode thumb
set arm force-mode thumb
target remote localhost:2345
break *0x801c470
c
This is setting the appropriate architecture for gdb to use, connecting to our remote server, and finally setting a breakpoint at the function that we think is used to check if the credit screen should be played. Specifically at the segment comparing our provided character to the one pulled from the string of available characters. We will be focusing on this assembly snippet:
1
2
3
4
5
6
7
8
9
10
11
12
13
14
15
16
17
                             LAB_0801c470                                    XREF[1]:     0801c48c(j)
        0801c470 69 46           mov        r1,sp
        0801c472 88 18           add        r0,r1,r2
        0801c474 a1 18           add        r1,r4,r2 ; Update the pointer to the password we entered with the current index
        0801c476 09 78           ldrb       r1,[r1,#0x0]; r1 contains the provided password index value, for example "B" == 0, "C"==1, etc
        0801c478 c9 18           add        r1,r1,r3; r3 contains the pointer to the string of available characters, we are adding the index of the current password character to this pointer.
        0801c47a 00 78           ldrb       r0=>local_14,[r0,#0x0] ; Load r0 with the value of the "CRDT5" string at the index specified by r2 from the location on the stack
        0801c47c 09 78           ldrb       r1,[r1,#0x0]=>s_BCDFGHJKLMNPQRSTVWXYZ012345678   = "BCDFGHJKLMNPQRSTVWXYZ01234567 ; Load the character representation of the entered value we provided for the password
        0801c47e 88 42           cmp        r0,r1 ; Compare the two!
        0801c480 00 d0           beq        LAB_0801c484
        0801c482 00 25           mov        r5,#0x0
                             LAB_0801c484                                    XREF[1]:     0801c480(j)
        0801c484 01 32           add        r2,#0x1; Increment the index counter
        0801c486 04 2a           cmp        r2,#0x4
        0801c488 01 dc           bgt        LAB_0801c48e
        0801c48a 00 2d           cmp        r5,#0x0
        0801c48c f0 d1           bne        LAB_0801c470
After entering these commands, let’s see if our breakpoint gets hit using Ghidra…

Excellent - not only the the breakpoint hit but all of the registers have been updated in the resisters window. Now let’s investigate these assumptions that we’ve made about the password checking and see if they are correct. If we step through a few instructions until we hit 0801c474. The assumption at this point is that we r1 will be pointing to an array of indexes representing the characters we entered. Let’s examine memory and find out:
Note: If you are remotely debugging using gdb-multiarch and are finding that some breakpoints aren’t being hit - try using the stepi command instead of c. This is an issues that I’ve seen in mGBA before and does not have anything to do with Ghidra’s GDB server.
1
2
3
(gdb)x/10x $r1
0x2005998:  0x01  0x0d  0x02  0x0f  0x1a  0x00  0x00  0x00
0x20059a0:  0x00  0x4f
Aha! This is exactly what was expected, instead of storing the actual ascii characters that we enter as a password it stores their index value into a table of available characters:
| Index Val | Character Val |
|---|---|
| 0x1 | “C” |
| 0x0d | “R” |
| 0x02 | “D” |
| 0x0f | “T” |
| 0x1a | “5” |
Just to test this theory, let’s see what happens if we enter CGHDR as the password and set the same breakpoints:
1
2
3
4
5
Breakpoint 3, 0x0801c476
Can't determine the current process's PID: you must name one.
(gdb)x/10x $r1
0x2005998:  0x01  0x04  0x05  0x02  0x0d  0x00  0x00  0x00
0x20059a0:  0x00  0x60
| Index Val | Character Val |
|---|---|
| 0x1 | “C” |
| 0x04 | “G” |
| 0x05 | “H” |
| 0x02 | “D” |
| 0xD | “R” |
Exactly as we expected - so now we have an idea as to how these passwords get stored, what they look like in memory and we can debug/set breakpoints from within Ghidra. I think that this makes for a good stopping point - for the next post, we will research some of these other password functions using Ghidra and the remote GDB debugging functionality that we set up today.
Conclusion
With this post, we’ve taken a look at what tools are available to help with building Ghidra. We also reviewed some of announced debugging capabilities and using those were able to remotely debug a Game Boy Advance game. A lot of what we did today you could have also done using gdb-multiarch without having Ghidra in the mix - but I wanted to learn how some of this worked and share my findings along the way. As usual, if you have any questions or comments - please feel free to reach out to me on Twitter. If you’d like to learn more about Ghidra, or hardware hacking in general check out some of my free course materials.
Extra Information / Notes
| Emulator | Debugger | BP Count | Reg Working |
|---|---|---|---|
| mgba-qt | gdb-multiarch | 3 | |
| mgba-qt | dkp-gdb | 5 | |
| vba | dkp-gdb | 1 | Unknown packet errors |
| vba | gdb-multiarch | 0 | Unknown packet errors |
| gvba | gdb-multiarch | 0 | Unknown packet errors |
| gvba | dkp-gdb | 0 | Unknown packet errors |
| mgba | dkp-gdb | 5 | |
| mgba | gdb-multiarch | 5 |
Takeaways here - gvba does not work with any sort of modern GDB. gdb-multiarch seems to miss breakpoints for some reason, and gdb from devkitarm does not respond to ghidra appropriately to provide registers.